It can be frustrating when your code doesn’t work or you can’t get the Arduino software to recognize your SpinWheel. We’ve created this page to help you become more comfortable troubleshooting SpinWheel issues.
These tips will help you tackle the difficulties you encounter as you set up your SpinWheel and work through your first adventures. They will help you learn how to get better at diagnosing problems yourself. As you get more comfortable with programming the SpinWheel, you will refer to this guide less and less and discover pride in getting a piece of code to work on your own. This guide is meant to help you get started with the troubleshooting process, but you will likely come across errors in your programming explorations that are not discussed here. The framework shown here is meant to help you understand and gain experience with the troubleshooting process. Don’t worry if you spot a new error and don’t know how to fix it right away - learning to think creatively about errors and working through iterations of your code will help you become a better programmer!
If you have tried everything here and are still having trouble, please email mail@spinwearables.com with your problem (including a screen shot if possible) and we can help sort it out.
I can’t plug my battery into my SpinWheel
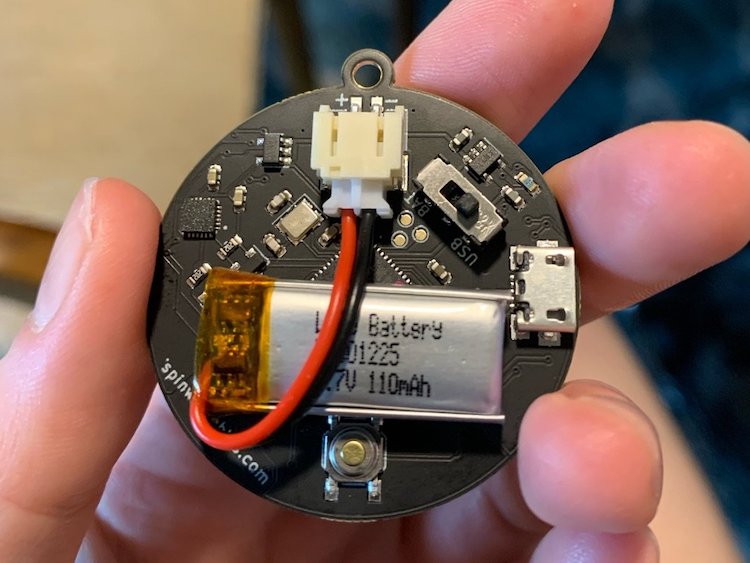
The battery fits very snugly into its jack on the SpinWheel, so attaching your battery can be challenging. You can push with plenty of force on the plastic plug of the battery - just be careful not to twist or damage the battery’s wires or the body of the battery itself. Make sure the notch at the top of the battery plug is lined up with the notch on the jack attached to the SpinWheel. Use both thumbs to push the battery into place. The battery does not need to fit all the way into the jack; you just need to make sure you get good contact with the two metal leads inside the jack. When you’ve plugged in your battery, turn on your SpinWheel by toggling the switch to “BAT” and see if it lights up. If it does, you are good to go. If it does not, keep trying to push the battery in a little more.

Important! If you are using your SpinWheel with the battery (not connected to a computer), make sure the switch on the back is set to “BAT”. If you are using your SpinWheel plugged into your computer, make sure the switch on the back is set to “USB”. You may notice strange behavior with your SpinWheel if your switch is not set properly.
I’m having problems installing Arduino
When you navigate to the installation page for the Arduino software, make sure to download the one for your computer: Windows (and the correct version), Mac, or Linux. Once you download it, your computer will direct you through the process of installing it like for any other program. If you get stuck, Arduino has provided instructions for each operating system that you can check out for more help.
Arduino won’t recognize my SpinWheel
If nothing appears in the Tools → Port menu when you plug in the SpinWheel there are a few things to try:
First, ensure the switch on the back of the device is set to “USB”, otherwise the device will not be reliably powered (it might be relying on a depleated battery instead of the plentiful power delivery from the USB cable).
Unplug the SpinWheel from your computer and then plug it in again. When you do this, make sure that you first close the
Toolsmenu. If you didn’t close it before unplugging it, you will not see a change because it doesn’t automatically refresh itself. When you plug your SpinWheel back in, re-open theToolsmenu, navigate toPortand see if you see your port appear.If this doesn’t work, try closing and re-opening the Arduino software. Occasionally this will clear up the problem.
If neither of the first two solutions works, your micro USB cable is likely the problem. Do you have another cable you can try? If so, first try your new cable. While most cables are able to communicate with the SpinWheel, some manufacturers have stopped including the extra wires necessary for passing information in their micro USB cables to cut costs (particularly if the cable is only meant to be used for charging). We have had better luck with older cables and those from Kindles: cables that were intended to be used to transfer information and not just for charging.
My code won’t upload onto my SpinWheel
If this is the first sketch you are trying to upload, start here and look a bit closer at the error message.

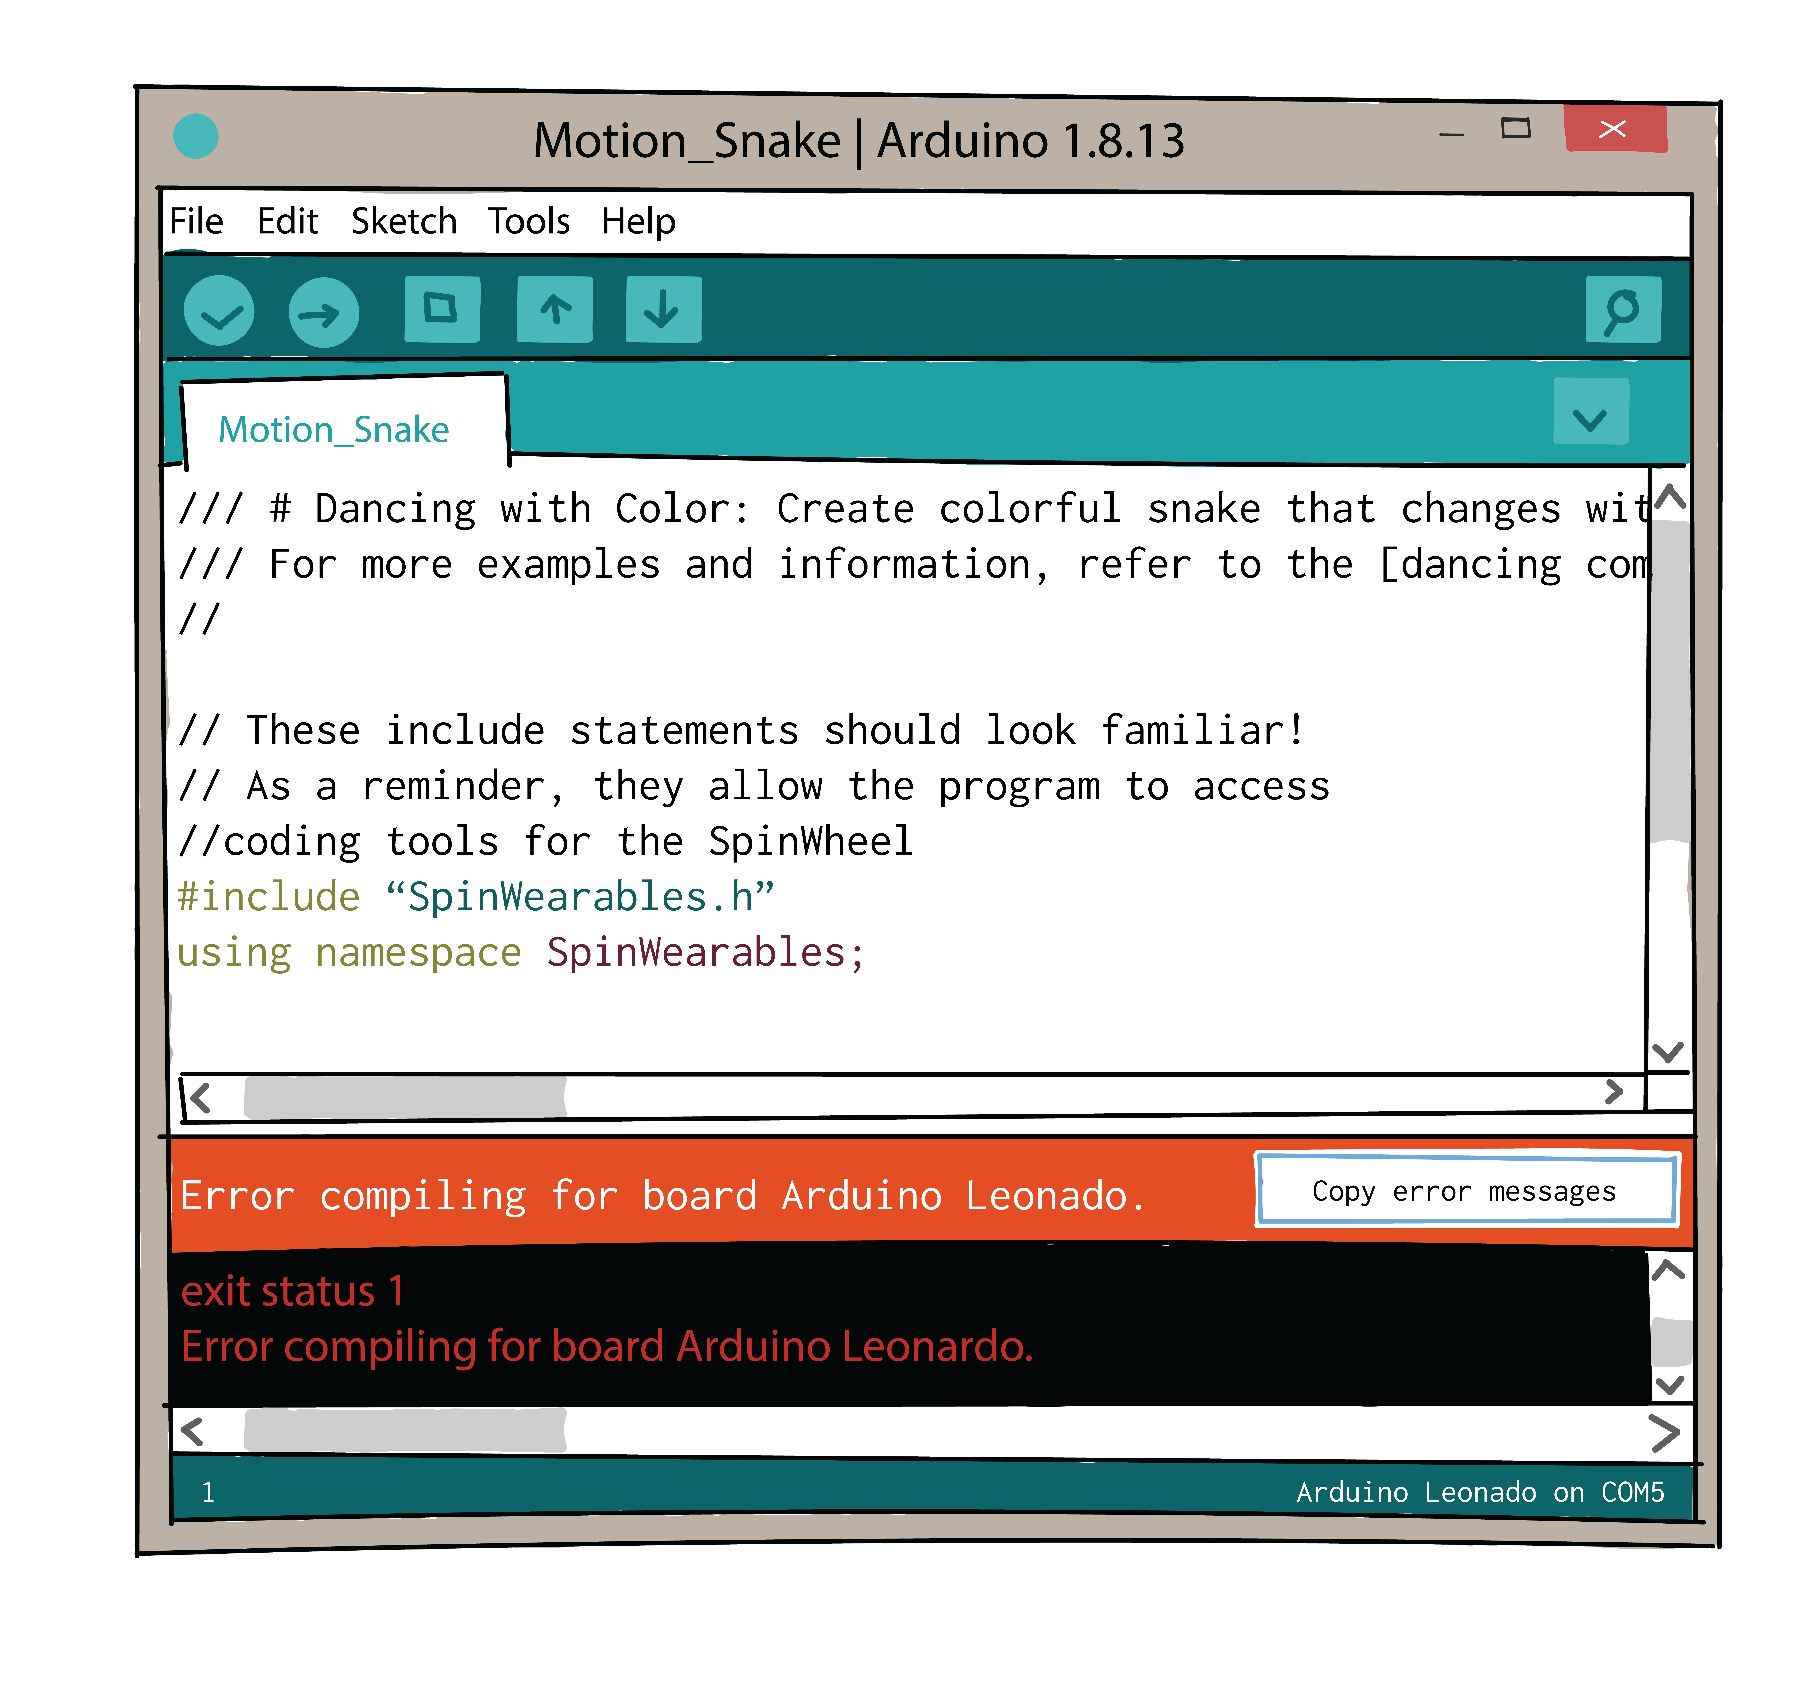
Error messages will appear at the bottom of the window with your sketch when you upload it onto the device. You only will be able to see part of the error message with the default layout of the window, but you can resize it to read the full message. We include some example errors below to help with troubleshooting.
As always, ensure the switch is set to “USB”, otherwise a depleated battery might be cause inconsistent behavior.
Try to only “compile” the code, but not upload it. To do this, click on the checkmark “Verify” button (to the left of the arrow “Upload” button). If there is a problem at this step, it means there is a problem with the code and supporting software. If the problem only appears when you click the upload button, it means the problem is in communicating with the SpinWheel.
No matter what the error message is, it is worthwhile to retry once or twice, in case of intermitten errors due to poor cable connections.
Make sure you have the proper board selected. On Mac, the error message
avrdude: ser_open(): can't open device "/dev/cu.usbmodem...": No such file or directoryindicates that you likely need to change which board you chose to the Arduino Leonardo. If you are on Windows, you may get the following error: “An error occurred while uploading the sketch.” To fix this, navigate toTools → Board:and click onArduino Leonardo.If instead you have the message
avrdude: butterfly_recv(): programmer is not respondingrepeating itself, then you haven’t picked the right port. While this error is similar for Windows and Mac, you may have to wait several minutes for it to first show up on Windows. Typically, uploading the sketch should take less than 30 seconds, so if it is taking a while that is a good indication that something may be wrong. See the above section “Arduino won’t recognize my SpinWheel” for more help for this problem.If you have an error like
In file included from [file location] fatal error: Adafruit_NeoPixel.h: No such file or directory #include "Adafruit_NeoPixel.h", then you likely need to install the SpinWearables library and its dependencies. This might be theAdafruit_NeoPixellibrary from the example above, or it might be another one. If you don’t remember installing, then you can install them usingSketch → Include Library → Manage Libraries.... In the search bar of the Library Manager, search forSpinWearablesand then clickInstalland also confirm that you want the dependency libraries to be installed as well. If you navigate to the libraries installer and you search forSpinWearablesand see the word “Installed” next to the library name, your library is already included.If you have done all of these things, you can try unplugging your SpinWheel and plugging it back in again or try restarting the Arduino software. These steps will clear issues up from time to time.
If your code won’t upload but you have installed other sketches to your SpinWheel successfully in the past:
Try uploading another Example SpinWheel sketch from
File→Examples. If this doesn’t work, try the above recommendations to make sure you have the right board and port selected and to ensure that you have the necessary libraries installed.If other sketches work, then it is likely the problem is due to a modification that was made to the sketch you are trying to upload. Keep reading the section on “I’ve tried writing my own sketch, but it doesn’t work…” or the specific section for the adventure you are working on to get some more troubleshooting ideas.
I’ve tried writing my own sketch, but it doesn’t work …
When you begin to write your own code or modify the existing sketches, troubleshooting becomes more challenging. Everyone gets stuck at times when writing new code. This can be very frustrating, particularly when you are new to a programming language. However, as you write more code, you will become more comfortable with this troubleshooting process. To help you as you do this, here are some suggestions:
As always, ensure the switch is set to “USB”, otherwise a depleated battery might be cause inconsistent behavior.
Make sure that you have the important setup information for each script that we presented in the Basic Structure of a Program lesson.
Is the error that you no longer have the right port or board selected? This is easy to forget to check, but will lead your code to fail. See above for more information.
You may find it helpful to look at your code line-by-line and make sure you are not missing any important pieces. For instance, maybe you are missing a semicolon or forgot to close a parenthesis.
Try breaking up the task in your code into simpler parts and testing each one individually. This will help you find the problem and be more likely to fix it. For example, if you are asking your SpinWheel to perform three tasks, try “commenting out” the second and third tasks (by adding
\\at the beginning of the line) and making sure the first task works. Then do this for the second and third to try to isolate the problem.Another thing that can help is trying out small pieces of the code on one of the virtual SpinWheels. You can navigate to any adventure or lesson with a virtual SpinWheel to try this. Not all modifications can be tested in this way, but it can help diagnose the problem.
Another suggestion to help identify an error in your code is to explain your code to a “rubber duck.” This doesn’t mean that you need to go hunt down a rubber duck. It simply means that by explaining what you are trying to do with every line to someone else (even an inanimate object who can give no feedback like a rubber duck) you can sometimes better spot the problem. Remember that computers do not solve problems on their own; they require a very specific set of instructions to follow. So, you’ll need to make sure your instructions are clear!
There are lots of helpful online resources for Arduino that you can find using your favorite search engine - while this won’t help you with specific SpinWheel commands, you can learn a lot about general Arduino programming by looking through all of the past troubleshooting tips and tricks generated by other Arduino users.
I’m stuck on an Adventure…
If you are stuck trying to figure out what a piece of code that we introduce does, we recommend first looking at the detailed comments that we provide for each sketch. These will be particularly useful as you begin to get more comfortable coding and start to write your own sketches. If you are confused by the content in a particular adventure, we suggest you take a look at the corresponding lesson for that adventure. Check out the table of contents to find which lessons are associated with which adventures.
If you have tried all of these recommendations and are still stuck, just email us at mail@spinwearables.com and we can help you troubleshoot. Please include a copy of the code you were trying to run and the error message. Having this information will allow us to more easily help you out.
