In this adventure, you will explore the ways we can describe motion mathematically and code the SpinWheel to light up based on simple linear dance motions. This is part one of the Dancing with Color series that turns the SpinWheel into an accessory that responds to your motions while dancing.
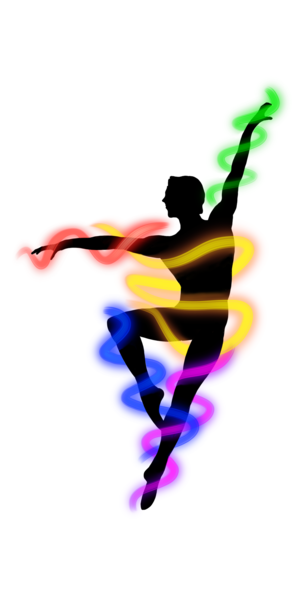
Whether you’ve watched a dance, or are a dancer yourself, you know dancing is all about movement. Be it a pirouette, a leap, or chasse, dancers gracefully move through space in exciting ways. In this adventure, we will write programs that light up the SpinWheel in different ways to different motions!
A Line Dance
The first type of motion we will explore is moving along a line. We can move back and forth on a line but in no other direction. This is called one dimensional motion. Below you can use your mouse to drag the circle along one dimension. Think of this like a dancer moving back and forth across the stage.
Notice when you dragged your mouse, your screen lit up at different brightnesses and colors! Try moving your mouse faster and slower!
As you can see, when you drag the mouse faster, the color gets brighter! How fast or slow the mouse is moving is called speed. Now, did you also notice that if you dragged the mouse to the left, then to the right, the color changes? The color represents the direction of our speed. When scientists care about the direction, we call it velocity! The color of the box becomes blue when we drag the slider to the right and red when we drag the slider to the left. The color tells us the direction we are moving (right or left). When we represent velocity with numbers, we call motion in one direction positive and motion in the opposite direction negative.
We discuss the idea of velocity more in our lesson on Vectors and Motion. Check it out if you want to learn more about velocity (and acceleration, which we’ll dive more into in the next section).
Dancing in Three Dimensions
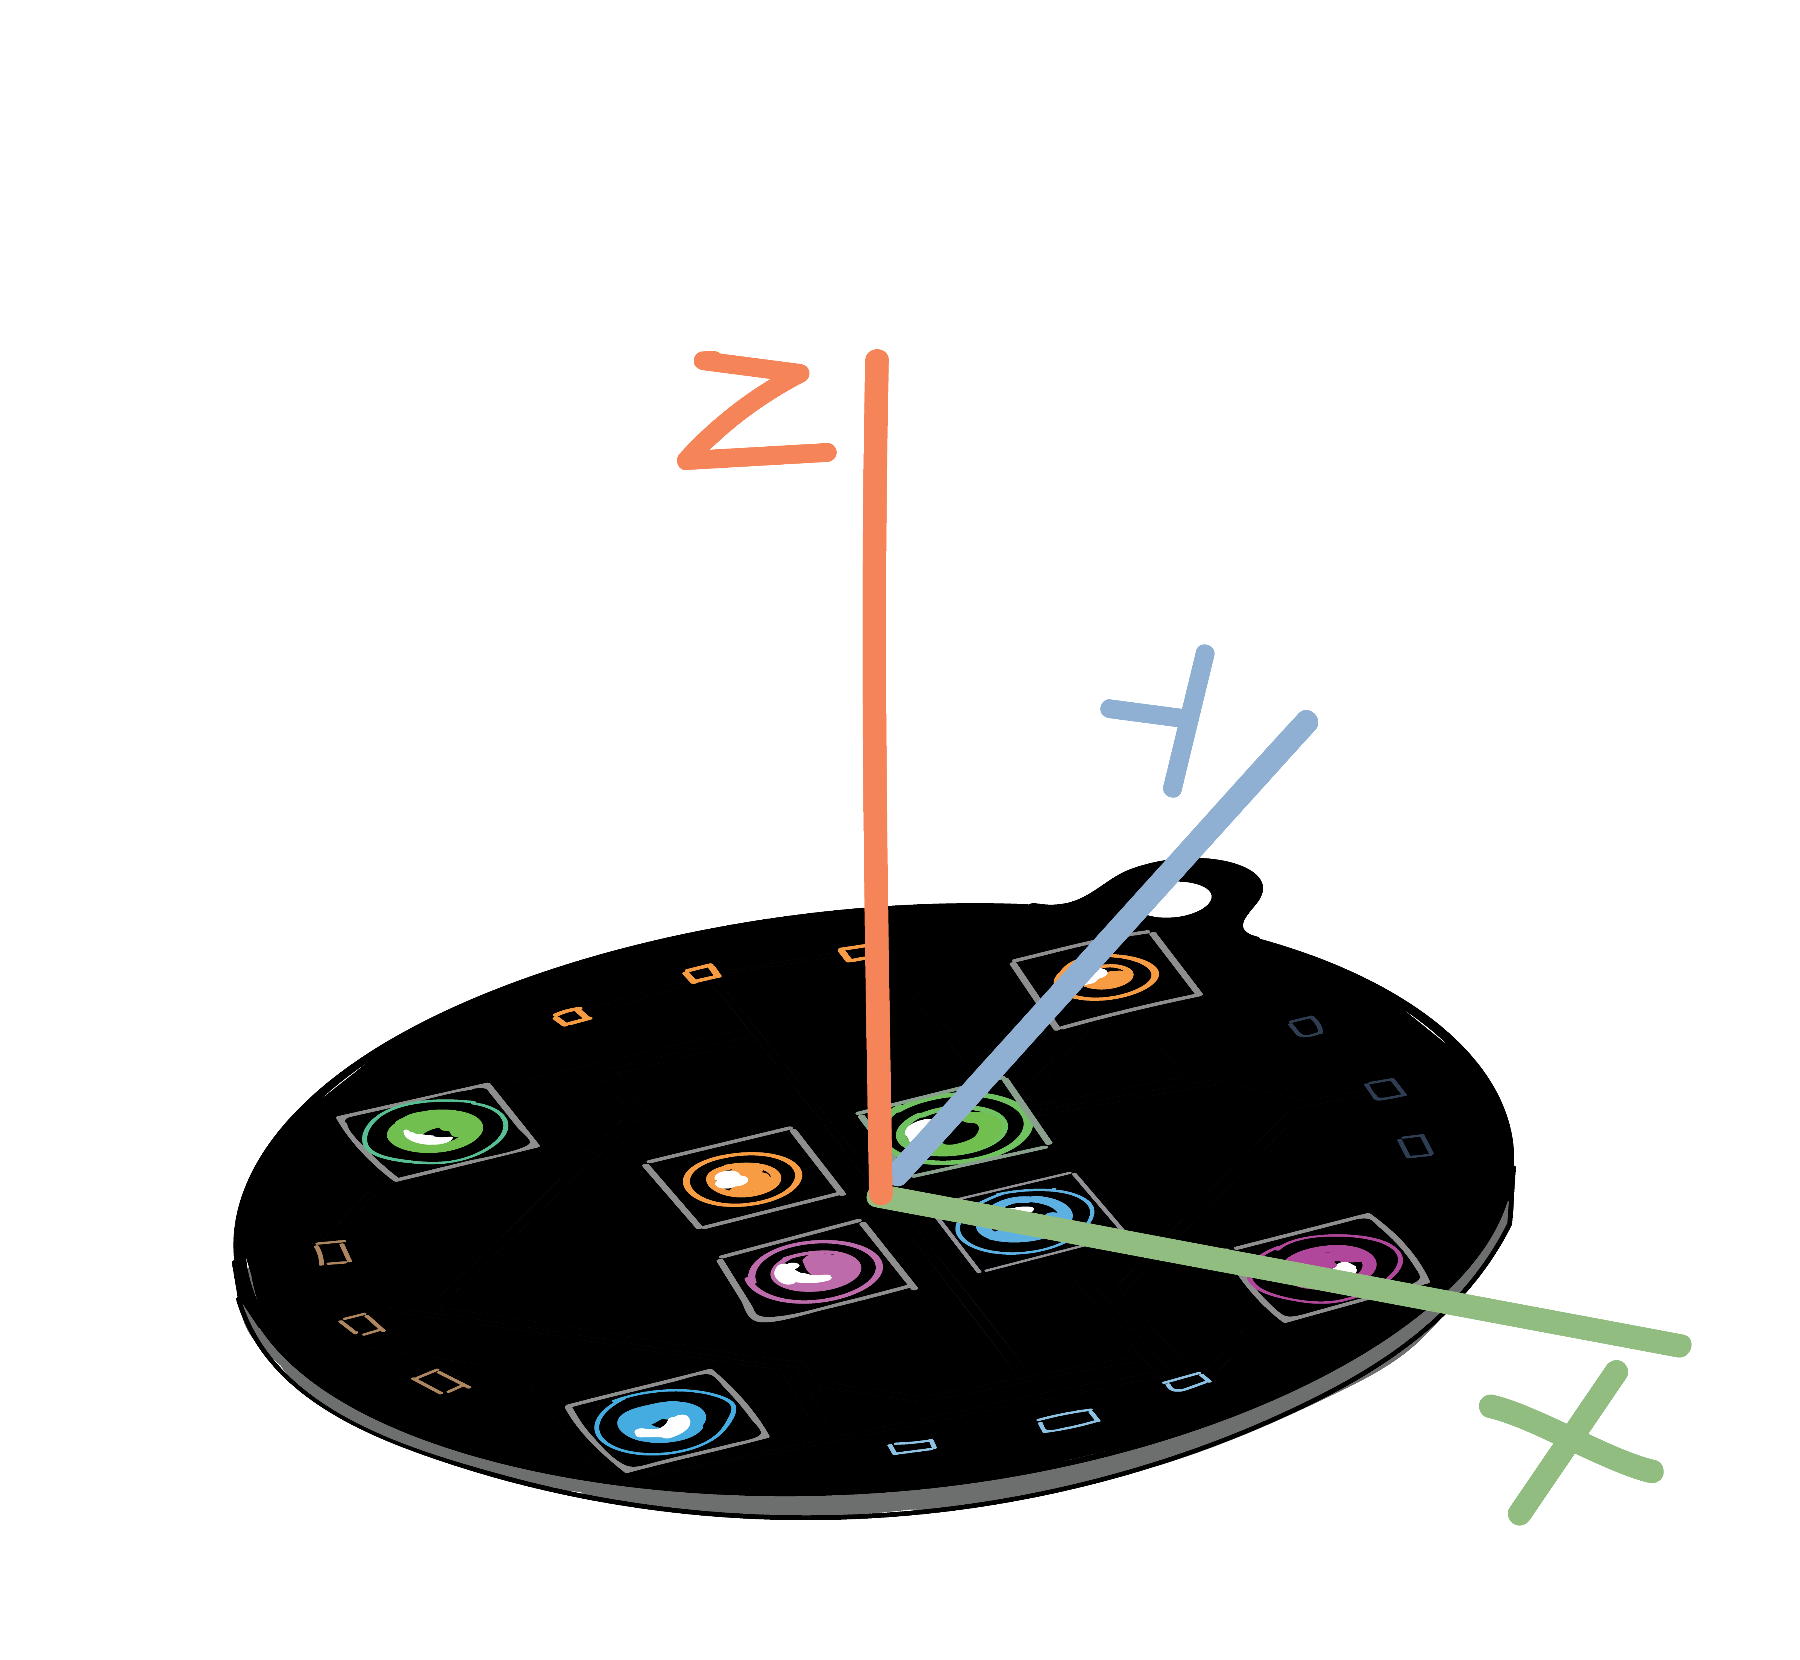
We’ve talked about motion in one dimension (1D), but we don’t live and move and dance on a single line. We’re free to go forwards and back, left and right, up and down, and even along curves. Instead of one line, we can represent our everyday motions as the movement along three lines (or axes). We call this three dimensional (3D) motion. When we move, or when the SpinWheel moves, we are travelling in 3D space. Inside your SpinWheel are motion sensors that can detect different types of motion along these axes. Check out the image below to see how these axes are oriented with respect to the SpinWheel. In the rest of this adventure, we’ll use the SpinWheel’s acceleration sensors. These sensors measure the SpinWheel’s acceleration (increase in speed) or deacceleration (decrease in speed) along the x, y, and z axes.
If you are curious about the sensor itself, check out our specs page where we talk more about the motion sensor and the other components of the SpinWheel.
The code below will light up the virtual SpinWheel in different colors as it moves. After you click Run, grab the SpinWheel and shake it.
void loop() {
  SpinWheel.readIMU();
  float ax = abs(SpinWheel.ax)*100;
  float ay = abs(SpinWheel.ay)*100;
  SpinWheel.setLargeLEDsUniform(ax, ay, 0);
  SpinWheel.drawFrame();
}
If you are interested in reading a more detailed explanation of what each line of the above sketch does, then check out this annotated script.
The ways the SpinWheel changes with motion is easier to see if you upload the sketch directly onto your SpinWheel: File → Examples → SpinWearables → Dancing_with_Color → Acceleration_Light_Up_Basic. After you open the file, you can upload this sketch to your SpinWheel and explore how the LEDs change as you shake the SpinWheel. To see these colors clearly, place your SpinWheel on a table, oriented to match the virtual SpinWheel. Try moving the SpinWheel left and right, as well as towards and away from you, while keeping it on the table.
The virtual SpinWheel can only move in two dimensions as it is trapped in the plane of your computer screen. For this reason, the code above and that you just uploaded onto your SpinWheel only shows the motion in two dimensions. Acceleration to the left and right (ax) controls the red component of the LEDs, while acceleration up and down (ay) controls the green component of the LEDs. The SpinWheel flashes yellow when it moves at an angle instead of straight up and down because then there is acceleration in both the horizontal and vertical directions (along both the x axis and y axis). If you carefully lift your SpinWheel from the table, you’ll notice that the color does not change. This is because movement along the z axis isn’t included in this code.
In the Vectors and Motion lesson, we talk more about how acceleration in 3D can be represented by the proportion of its acceleration in the x, y, and z direction. If this adventure is confusing, we encourage you to check that out for some background that might be useful.
Did how you moved your SpinWheel change the brightness? With a faster acceleration, you may have noticed that the SpinWheel’s LEDs lit up more brightly. You may have also noticed that if you move the SpinWheel with constant speed, the LEDs don’t light up. Since the SpinWheel only responds to acceleration, it only lights up when the speed is increasing (accelerating) or slowing down (deaccelerating).
To learn more about using the output from the SpinWheel’s motion sensors, we encourage you to try the Step Counter adventure. This adventure will teach you to access the output from the motion sensors, monitor it on your computer, and use this to turn your SpinWheel into a step counter. If you are just curious about learning how to visualize on your computer the output from the motion sensors, then check out the Arduino 101 lesson.
To have the SpinWheel instead respond to motion in all three dimensions, you can modify the code to also measure the acceleration in z direction. You can modify the Acceleration_Light_Up_Basic sketch by adding the following line after the line storing the acceleration in the y direction (float ay = abs(SpinWheel.ay)*100;):
float az = abs(SpinWheel.az)*100;and replacing the SpinWheel.setLargeLEDsUniform(ax, ay, 0); line with:
SpinWheel.setLargeLEDsUniform(ax, ay, az);Now if you lift the SpinWheel horizontally up off the table it will light up blue. This is because the blue component of the LEDs is controlled by acceleration in the z direction. Try disconnecting the SpinWheel from your computer (switch it to BAT to light up again) and shaking it in different ways. What colors can you create?
You may notice that the LEDs always light up one color, even though the SpinWheel remains still with this sketch. The reason for this is that the SpinWheel’s acceleration sensor can’t tell the difference between acceleration when you shake it and the force of Earth’s gravity pulling the SpinWheel towards it. If you change the orientation of the SpinWheel, which acceleration sensor measures gravity changes. Don’t worry if this seems confusing to you. This has also perplexed many scientists. For now, just try moving around the SpinWheel to observe how the color is changing. To start off, try holding SpinWheel by the keyring. Since it experiences gravity along the y-dimension (pulling straight down towards the floor), it will light up green. Then slowly tilt the SpinWheel to be horizontal. Did you notice how the blue LEDs began to light up as you tilted it? Once it was completely horizontal, then only the blue LEDs will be lit up. As you are tilting it, both the y and z axis acceleration sensors are experiencing the force of gravity. Once it is flat again, then only the z axis acceleration sensor experiences gravity.
The fact that our acceleration sensors measure both change in motion and gravity becomes important in the Step Counter adventure, so we will learn how to adjust for the effect of gravity there.
To wrap up this adventure, we’ll leave you with this video that illustrates another way math, physics, and art can be combined. This animation was created by Mariel Pettee, a physics graduate student who studies particle physics as well as physics and dance.
Mariel created this video using programming tools that she developed in collaboration with dancers, physicists, and computer science researchers. You can watch more of her videos here and read a paper on this research.
If you are excited about having your SpinWheel respond to rotational motion, continue on to part 2 of the Dancing with Color series of adventures.
