We’re so excited that you are ready to use your SpinWheel! This page provides details on the contents of your kit, instructions for turning it on for the first time and begins the process of setting you up to create new and exciting programs on your SpinWheel!
Contents
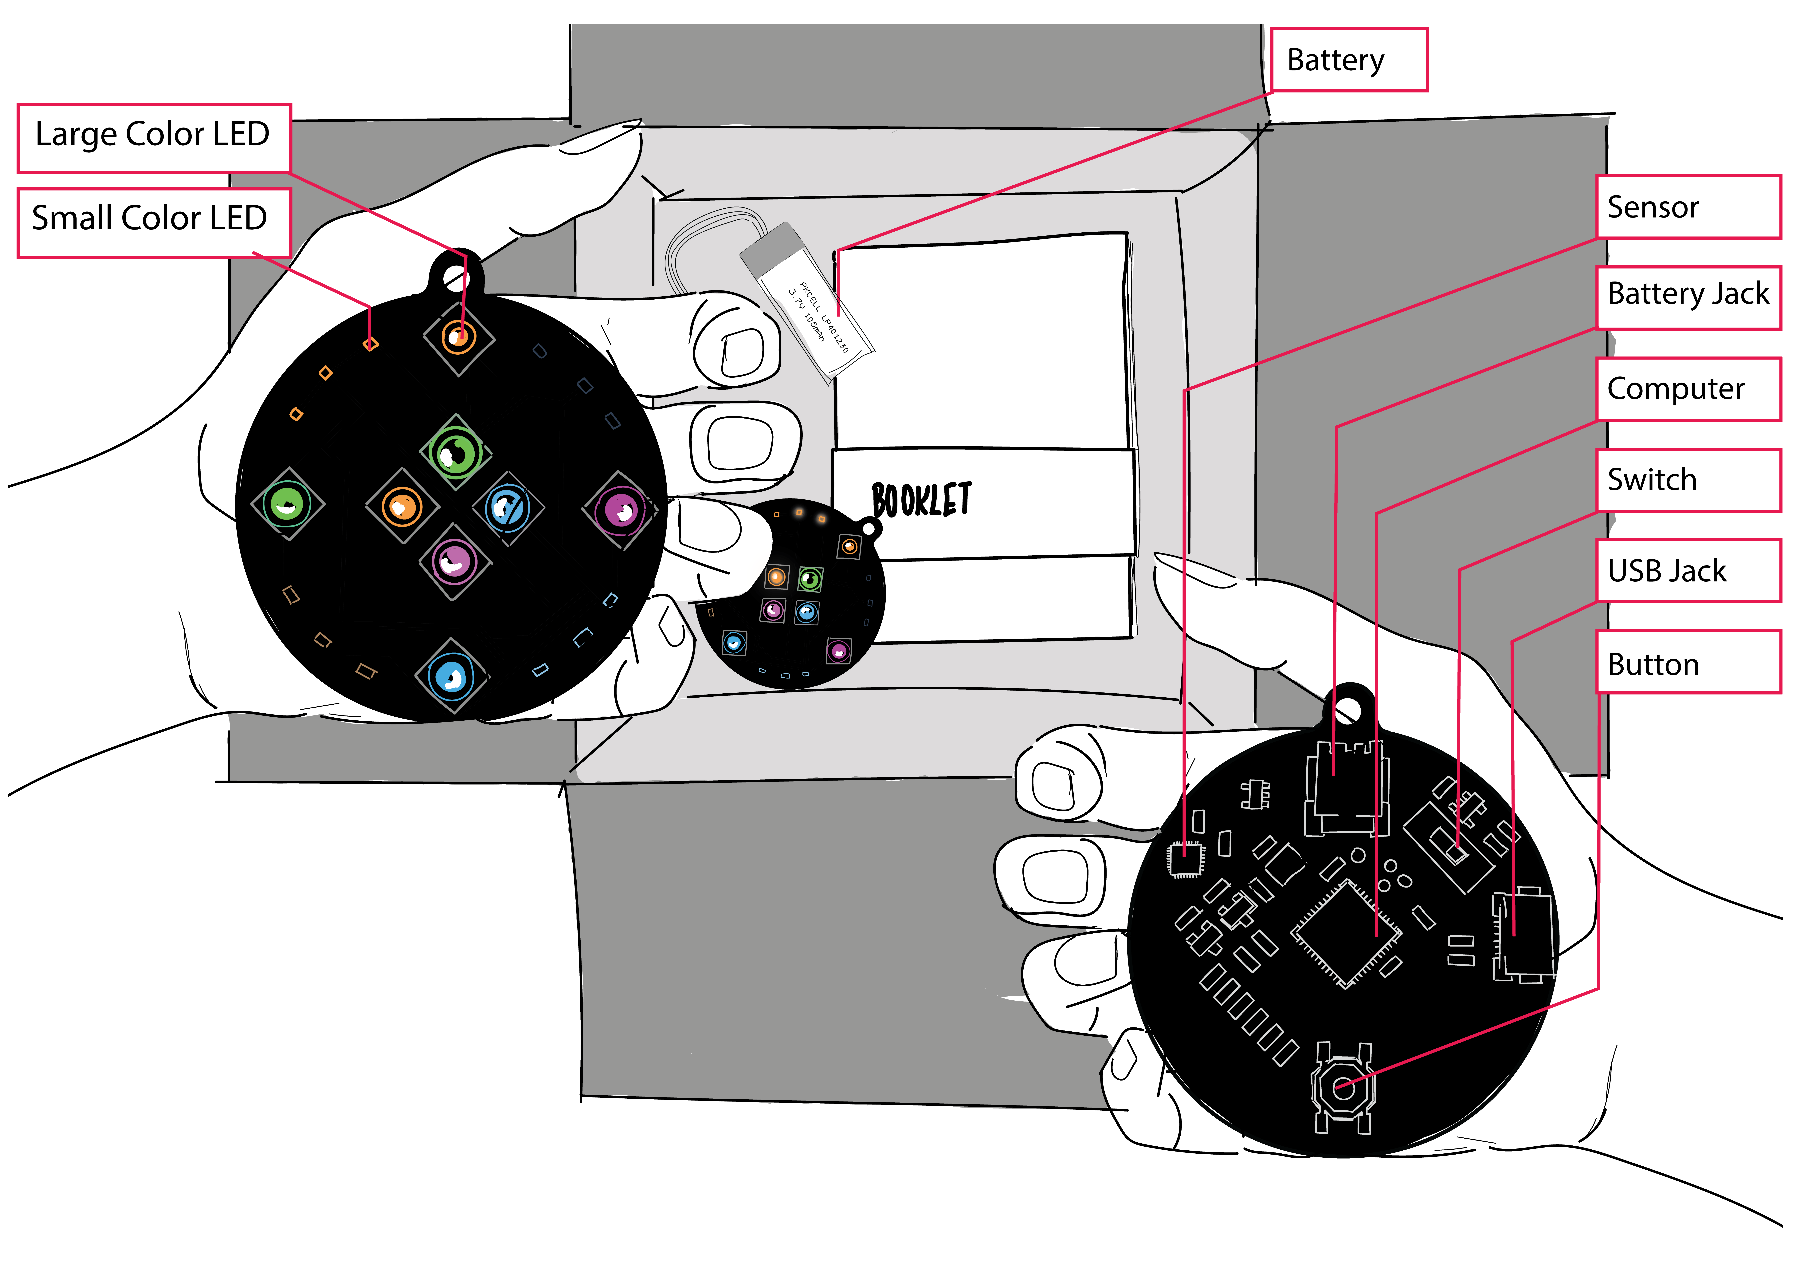
Your kit contains a SpinWheel, a battery, and, if you ordered one, a paper copy of the SpinWheel Field Guide. A micro USB cable is needed to charge and program the SpinWheel and is not included with the kit. You likely already own a micro USB cable (a Kindle or an old Android smartphone would use such a cable), but you can also buy a micro USB cable online.
The SpinWheel has four main components: a power source (the battery), a sensor (for motion and magnetic fields), a set of lights (the light emitting diodes, or LEDs), and a micro computer (the brain of the device).

The SpinWheel contains sensitive electronic components. While they are securely soldered to the devide, they can break if jostled excessively. For this reason, it is important to be gentle with your SpinWheel when you attach the micro USB cable, and when putting it into a backpack, purse, or pocket. It is also particularly important to treat the battery with care; do not puncture or bend it. Storing the SpinWheel in a smaller pocket within your bag or in the box you received it in will help keep it safe.
Your kit may have come with a paper booklet (the SpinWheel Field Guide) with some hands-on adventures and reference materials to assist you as you are programming the SpinWheel. The activities in the booklet are also found in expanded versions online. We highly recommend that you make use of both.
Quick Start

The battery of your Spinwheel might not be attached when you receive it. Before attaching the battery, slide the switch on the back of the SpinWheel to be on “USB.” Then firmly insert the battery connector into the battery jack on the circuit board. If you have difficulty, see our Troubleshooting Guide.
To turn on the SpinWheel, flip the switch on the back to “BAT” (for “battery”). You should see it turn on and light up brightly!
The SpinWheel comes preloaded with several basic animations. You can press the button on the back of the SpinWheel to toggle between different animations.
To turn off the SpinWheel, flip the switch to “USB”.
To charge, plug a micro USB cable into the USB jack on the back of the SpinWheel, set the switch to “USB” and charge using a computer or USB-to-wall converter. Note: the battery may require charging before use. Reaching full charge takes approximately 1 hr.
The switch on the SpinWheel should be set to “USB” whenever it is plugged into your computer, whether to charge or to program. You should also keep the switch in this position when you are not using the SpinWheel and for long term storage to protect the battery from discharging.
The SpinWheel will not work properly if connected to a computer/charger without having the switch set to USB. It will not charge and programming it would be extremely unreliable.
Installing the Arduino Software
Much of the joy of the SpinWheel comes from your ability to change it and make it do whatever you wish! The rest of the guide will walk you through adding a new animation to your SpinWheel. Do not worry if you find this part challenging, learning new things can be confusing at first. If you get stuck, check out the Troubleshooting Guide and don’t be afraid to experiment. While feeling confused is normal, it will get easier as you go!
In order to write new animations for the SpinWheel, you will need a way to reprogram the computer on the SpinWheel. We use the Arduino programming language to communicate with the SpinWheel.
- Start by installing the Arduino software on your computer, which you can download for free from arduino.cc/en/Main/Software. For step by step help, Arduino has provided instructions for each operating system.
Configuring the Arduino Software
Once the software is installed, we have to configure it to communicate with the SpinWheel.
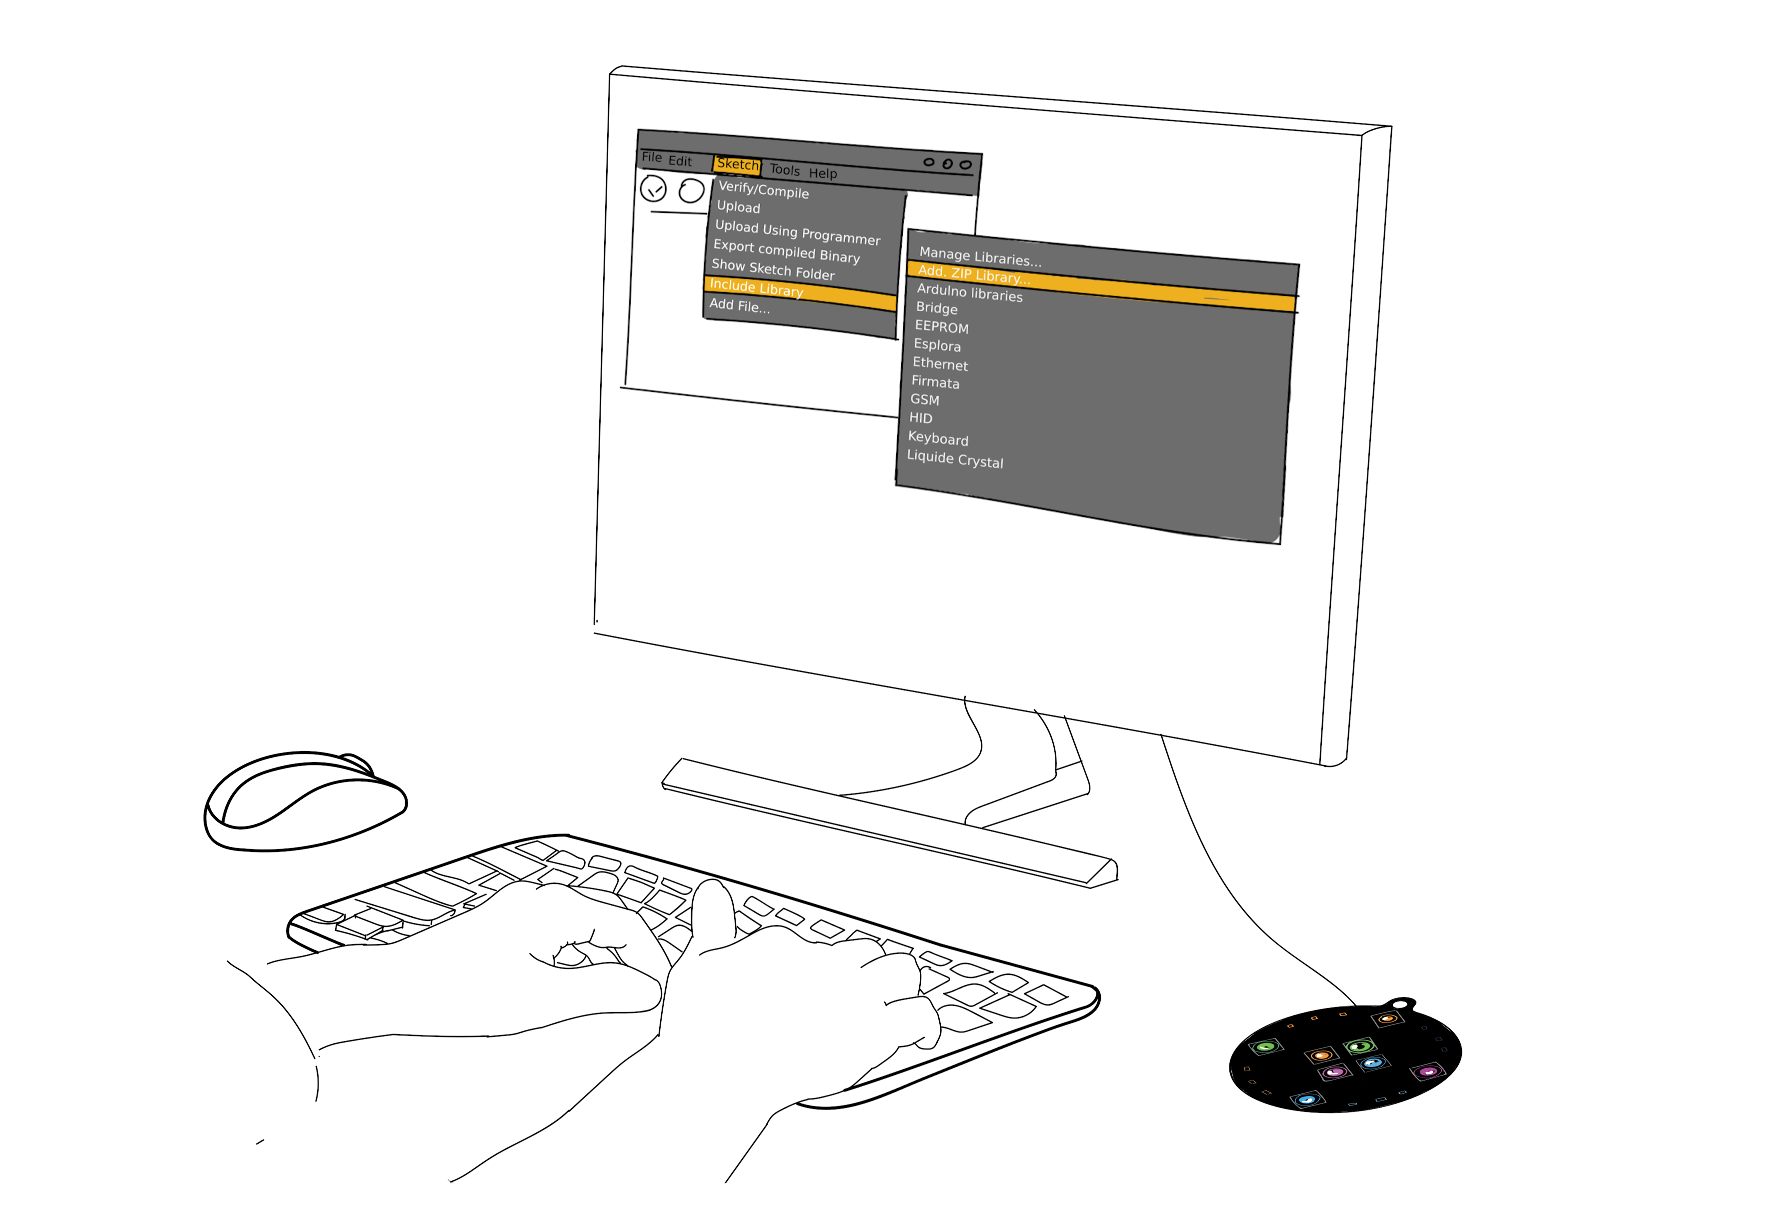
Plug your SpinWheel into your computer with a micro USB cable and flip the switch to the position labeled “USB”.
Open the Arduino software.
Open the
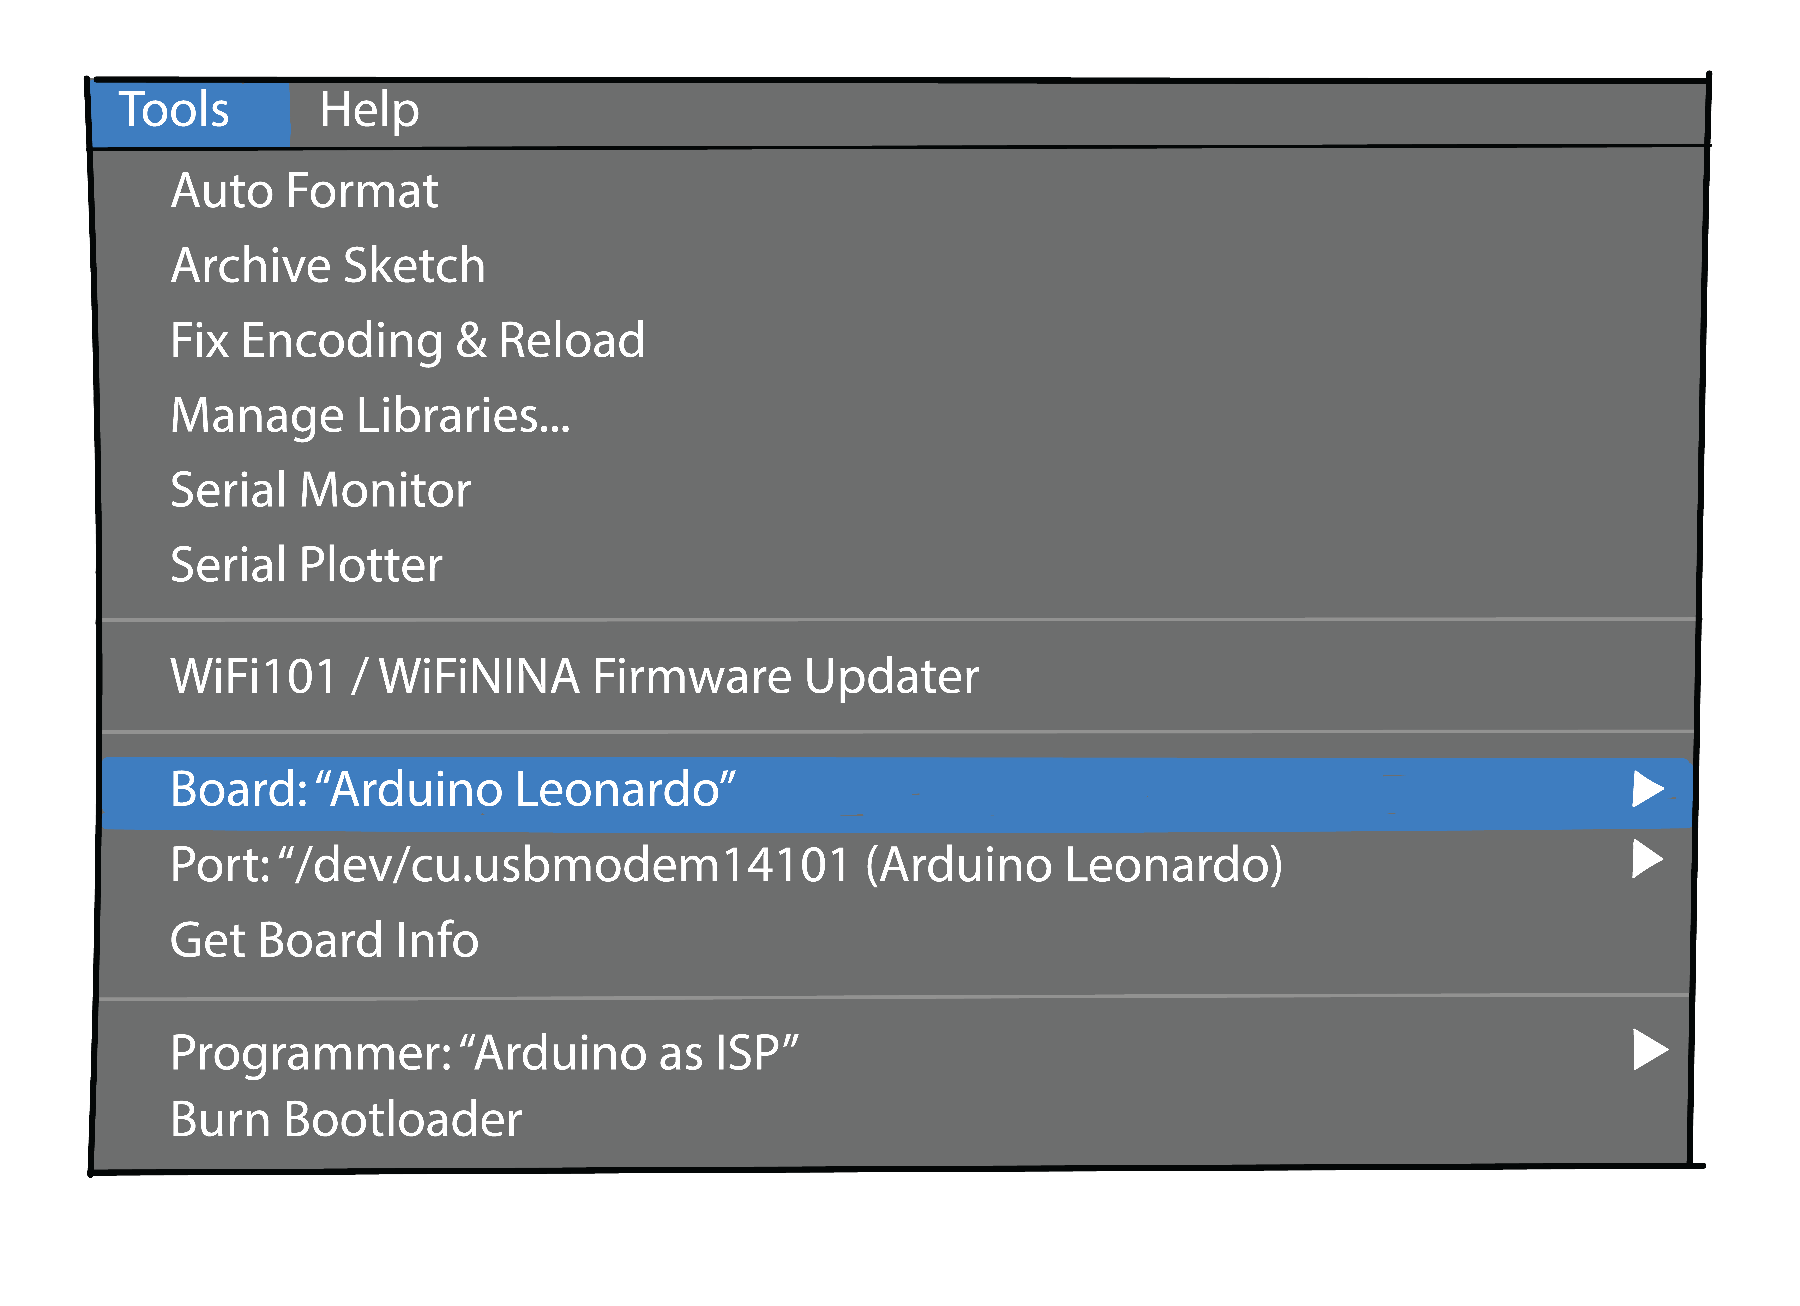
Toolsmenu and go toPort. You will see a list of serial ports on your computer; select the port that corresponds to the SpinWheel.If there are multiple ports and you are unsure which one to use, simply unplug the SpinWheel and see which serial port disappears when you do so. This port corresponds to your SpinWheel’s serial port. If you do not see a port appear/disappear, you may need to try a different micro USB cable. We have more tips about this in our Troubleshooting Guide.
Go back to the Tools menu and select
Tools → Board. Select Arduino Leonardo as the board (a.k.a. processor), so that the software knows which “dialect” Computer languages have dialects just like human languages! to use to talk to the SpinWheel.

Properly selecting the board and port are essential for the Arduino software to communicate with the SpinWheel. If you are unable to upload code to the Spinwheel in the next section, double check that the switch is set to “USB” and that you have the correct board and port selected.
Installing the SpinWheel Libraries
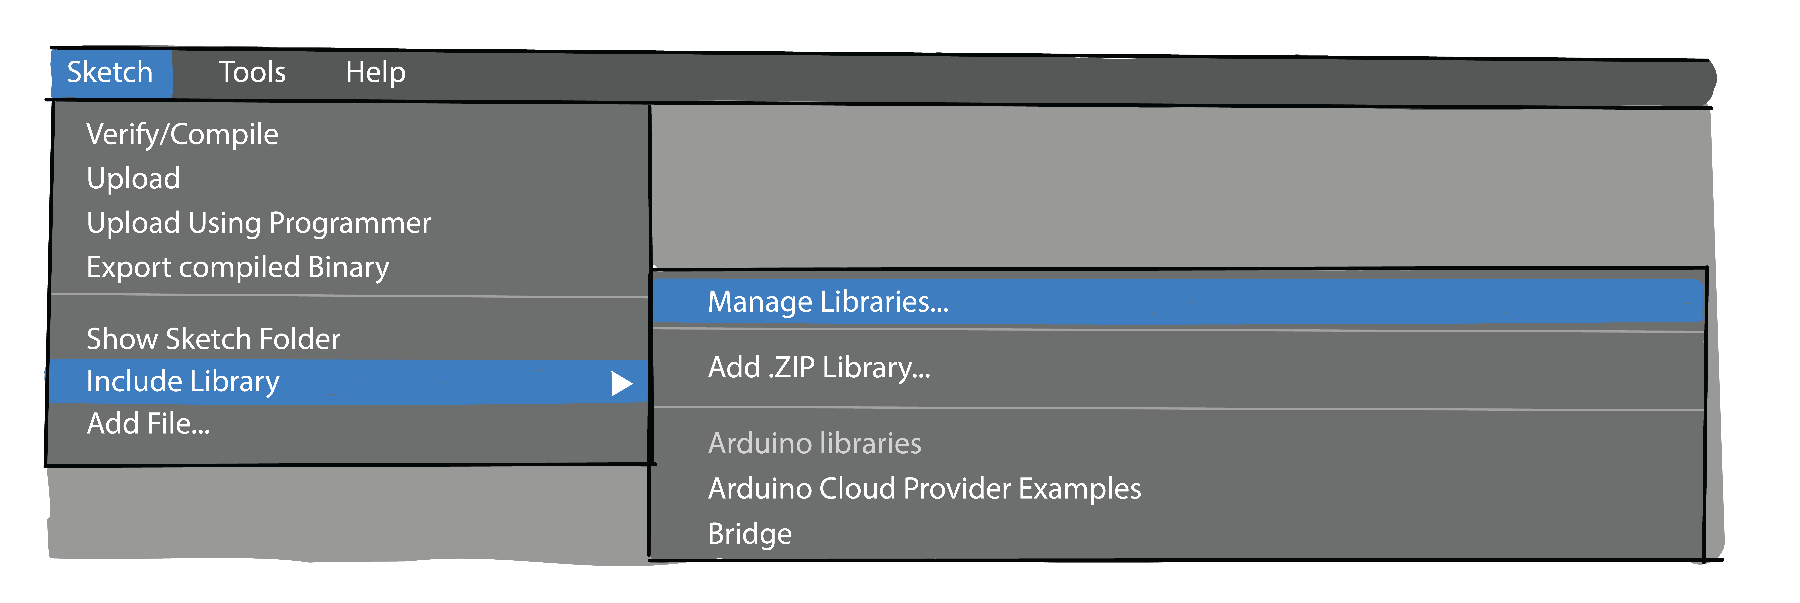
To get the first set of examples of this new language and the other libraries necessary to run the SpinWheel code, download our SpinWearables Arduino Library using
Sketch → Include Library → Manage Libraries....In the search bar of the Library Manager, search for
SpinWearablesand then clickInstall.You will be automatically prompted to install two other required libraries (
NeoPixelfor controlling the LEDs andICM 20948for reading the motion sensor). You will need to install both of these to use the SpinWheel.

Running a Program on the SpinWheel
To test that your SpinWheel is working properly, you can install a new program, or sketch, from the example files to animate your SpinWheel.
Choose a file to install by opening
File → Examples → SpinWearablesand picking one of the examples. For instance, pickBlinkingFirmware. This will open a new window with the code.Upload the code to your SpinWheel by pressing the upload button (the arrow at the top).

Now your SpinWheel will have the new colorful blinking pattern (from BlinkingFirmware) you just uploaded. If you get an error here, then check out our Troubleshooting Guide for help on some common problems.
Exploring the SpinWheel further
Feel free to open any of the other SpinWheel sketches and upload them onto the device. Do not worry about understanding what the code does, you will learn more about this language in future lessons. We encourage you to experiment with these examples! If you want to save any changes, you will be prompted to save the sketch in a new location (can be anywhere on your computer). The original file will always be available to open again.
Uploading a new sketch to your SpinWheel will overwrite the preloaded sketch that came on it. If you want your SpinWheel to have the sketch that it came with, simply open the SpinWheelStockFirmware example and upload it.
In future SpinWheel activities, you will be writing new sketches to animate the SpinWheel. To transfer a sketch from your computer to your SpinWheel, simply connect your SpinWheel to your computer, change the switch to “USB”, open the code of your new sketch in the Arduino software and press the upload button.
Congratulations! You are now ready to continue with the rest of the SpinWheel activities!
