Getting Started with the SpinWheel
Based on the Getting Started and Initial Setup pages.
Setting up the SpinWheel
Setting up the SpinWheel
See spinwearables.com/quickstart for details.
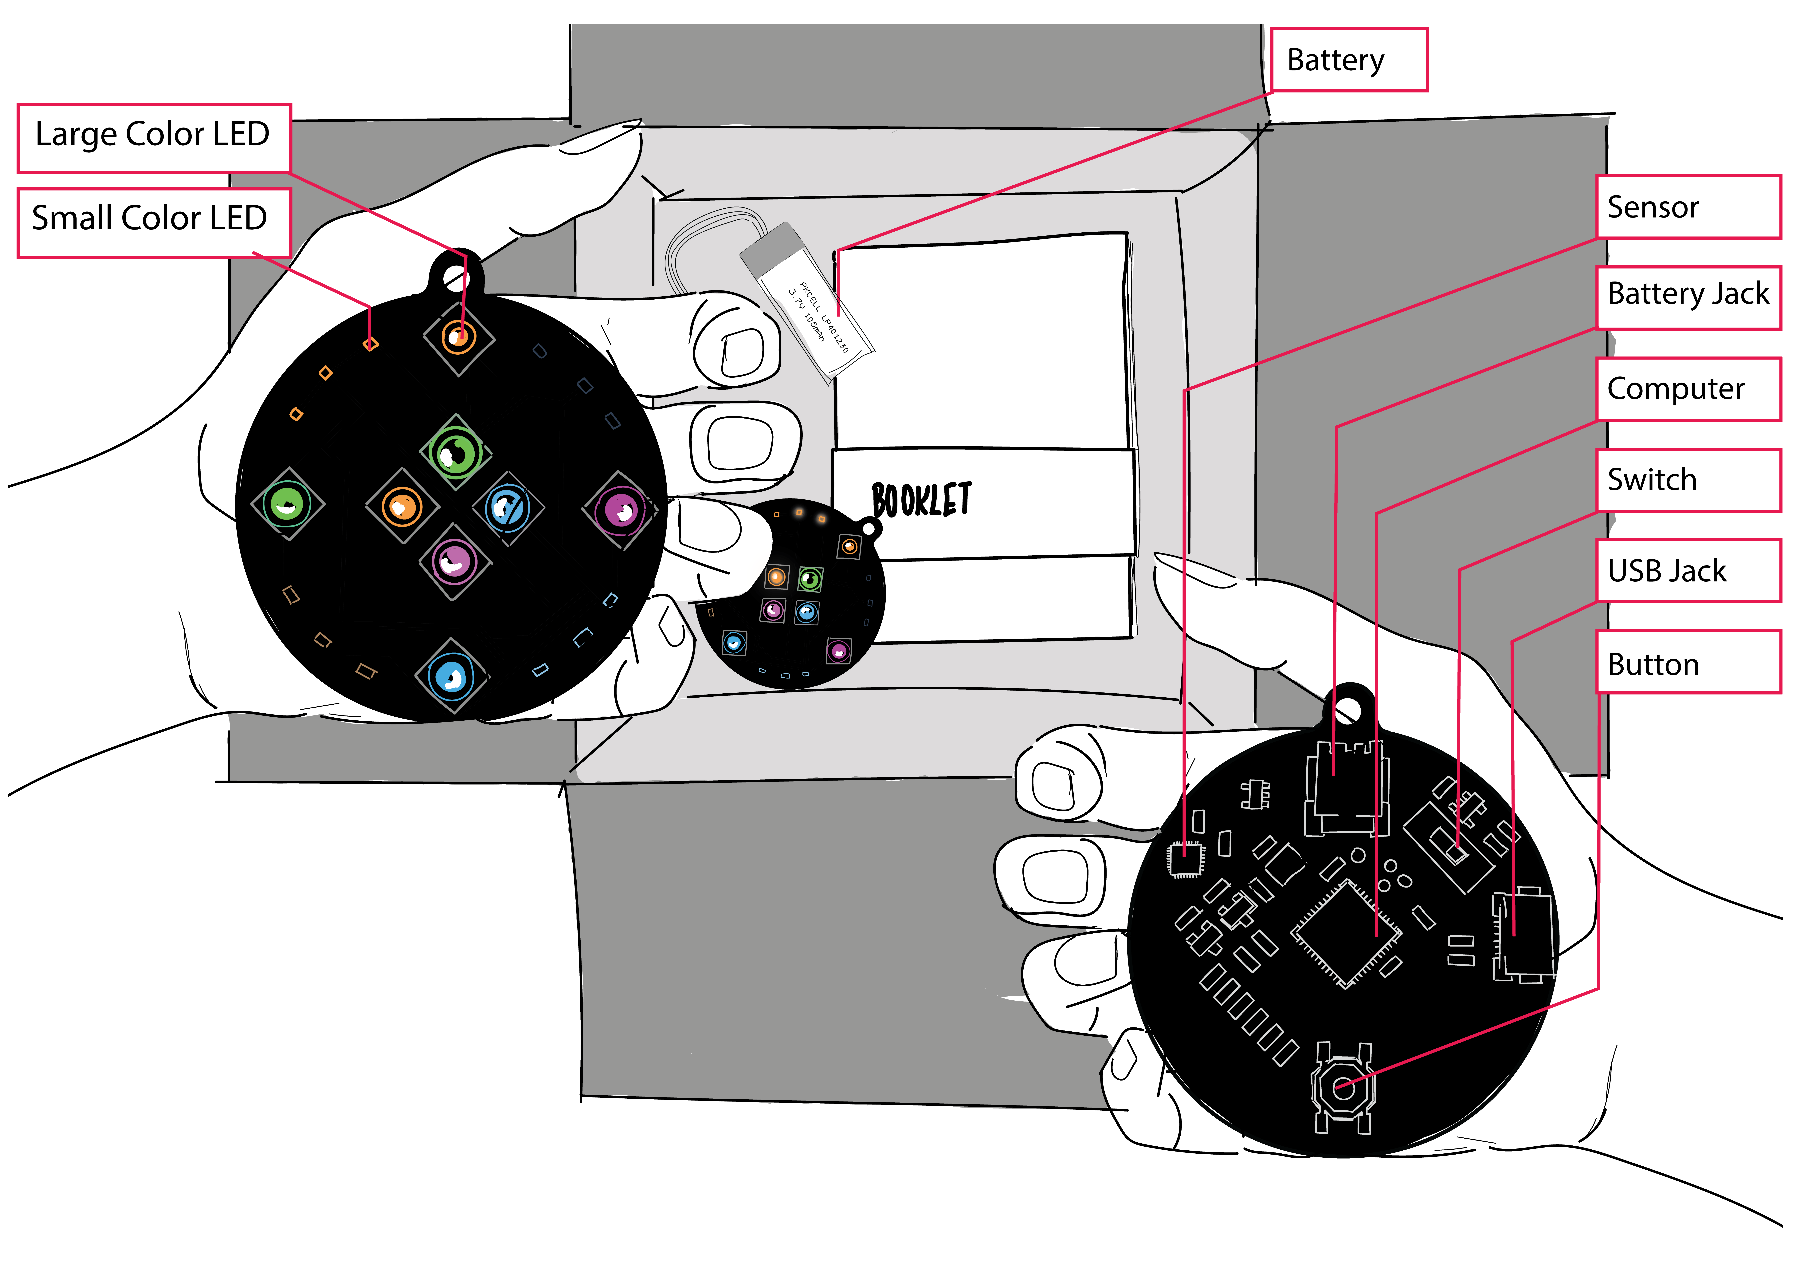
- The battery of your Spinwheel might not be attached when you receive it. Before attaching the battery, slide the switch on the back of the SpinWheel to be on “USB.” Then firmly insert the battery connector into the battery jack on the circuit board. If you have difficulty, see our Troubleshooting Guide.
- To turn on the SpinWheel, flip the switch on the back to “BAT” (for “battery”). You should see it turn on and light up brightly!
- The SpinWheel comes preloaded with several basic animations. You can press the button on the back of the SpinWheel to toggle between different animations.
- To turn off the SpinWheel, flip the switch to “USB”.
- To charge, plug a micro USB cable into the USB jack on the back of the SpinWheel, set the switch to “USB” and charge using a computer or USB-to-wall converter. Note: the battery may require charging before use. Reaching full charge takes approximately 1 hr.
Installing arduino.cc/en/software
We will use the Arduino programming environment, which is open and free to install.
Do not worry if you find this part challenging, learning new things can be confusing at first.
If you get stuck, check out the Troubleshooting Guide at spinwearables.com/troubleshoot and don’t be afraid to experiment.
While feeling confused is normal, it will get easier as you go!
Configuring the Arduino Software
Once the software is installed, we have to configure it to communicate with the SpinWheel.
Plug your SpinWheel into your computer with a micro USB cable and flip the switch to the position labeled “USB”.
Open the Arduino software.
- Open the
Toolsmenu and go toPort. You will see a list of serial ports on your computer; select the port that corresponds to the SpinWheel.
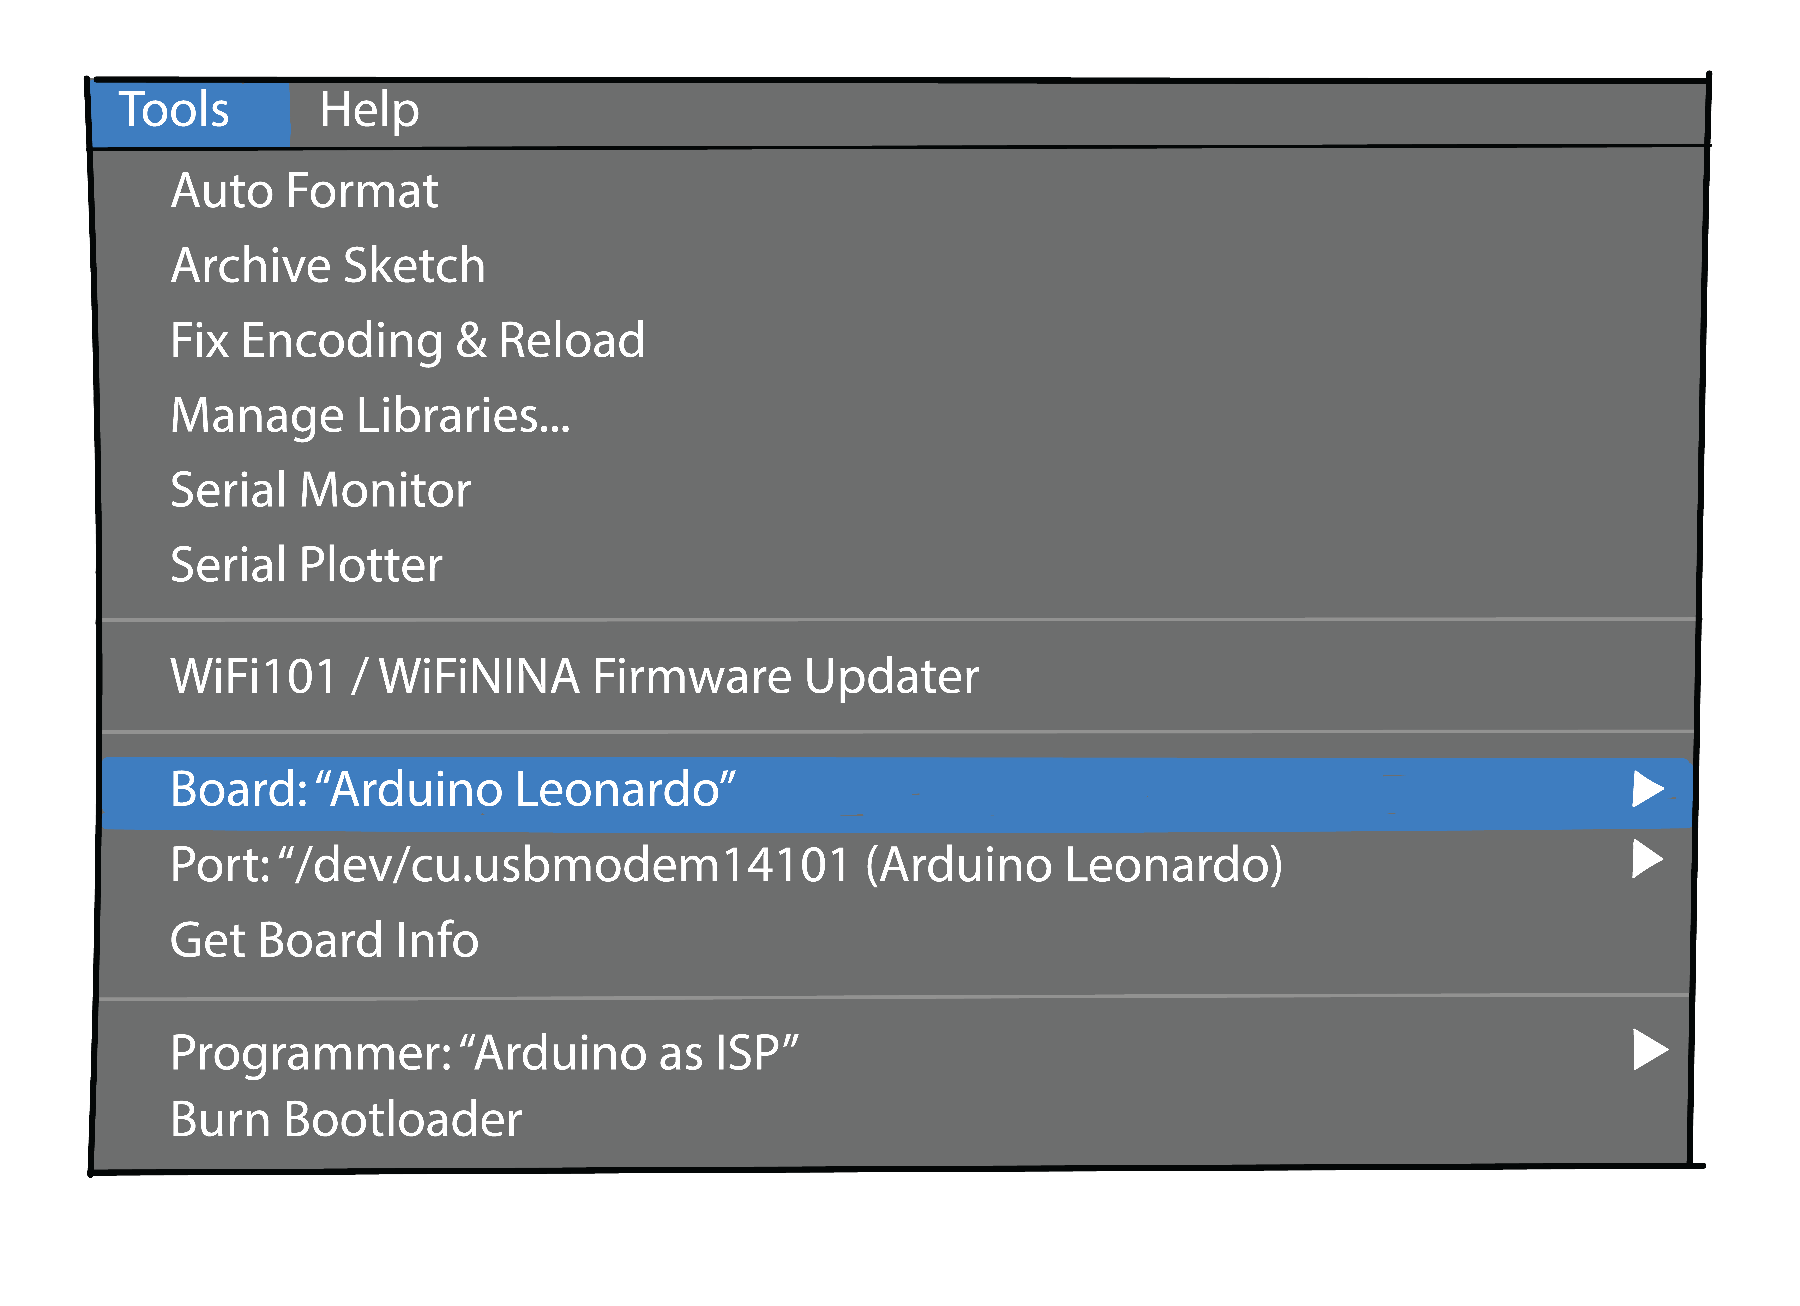
Tools → Board. Select Arduino Leonardo as the board (a.k.a. processor), so that the software knows which “dialect” to use to talk to the SpinWheel. image credit Mariya KrastanovaProperly selecting the board and port are essential for the Arduino software to communicate with the SpinWheel. If you are unable to upload code to the Spinwheel in the next section, double check that the switch is set to “USB” and that you have the correct board and port selected.
Installing the SpinWheel Libraries
- To get the first set of examples of this new language and the other libraries necessary to run the SpinWheel code, download our SpinWearables Arduino Library using
Sketch → Include Library → Manage Libraries....
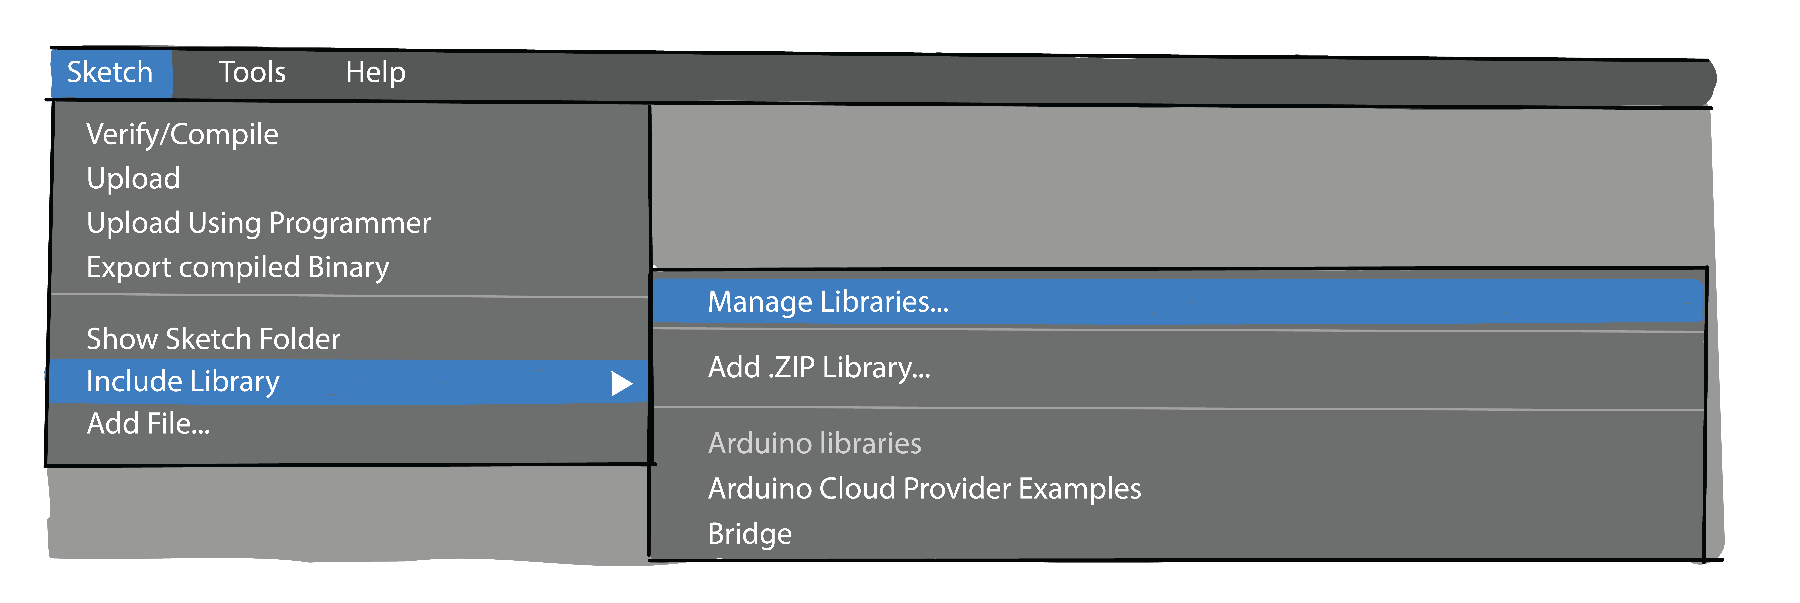
SpinWearables and then click Install. image credit Mariya KrastanovaRunning a Program on the SpinWheel
To test that your SpinWheel is working properly, you can install a new program, or sketch, from the example files to animate your SpinWheel.
- Choose a file to install by opening
File → Examples → SpinWearablesand picking one of the examples. For instance, pickBlinkingFirmware. This will open a new window with the code.

Now your SpinWheel will have the new colorful blinking pattern (from BlinkingFirmware) you just uploaded. If you get an error here, then check out our Troubleshooting Guide for help on some common problems.
What does it mean to program an artistic piece of electronics?
What does it mean to program an artistic piece of electronics?
See spinwearables.com/intro for details.
0
0
0
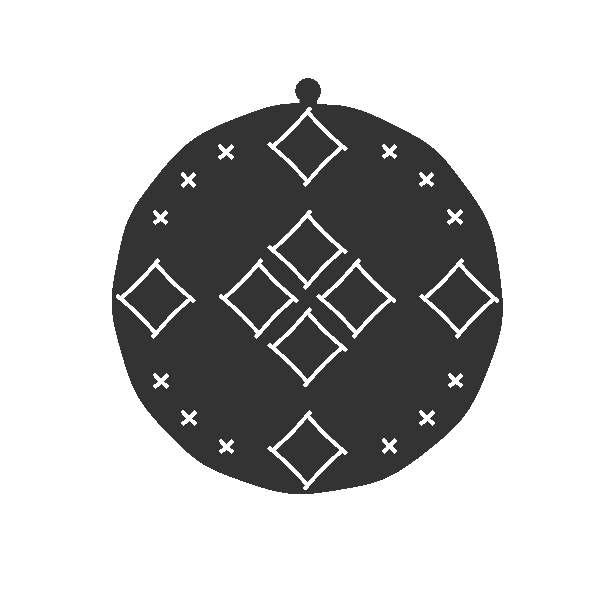
The corresponding command in code looks like SpinWheel.setLargeLEDsUniform(50, 255, 250)
void loop() {
  SpinWheel.clearAllLEDs();
  SpinWheel.drawFrame();
}
LED Number 0
255
255
255

The corresponding command is SpinWheel.setLargeLED(4, 255, 0, 100);
void loop() {
  SpinWheel.clearAllLEDs();
  SpinWheel.drawFrame();
}
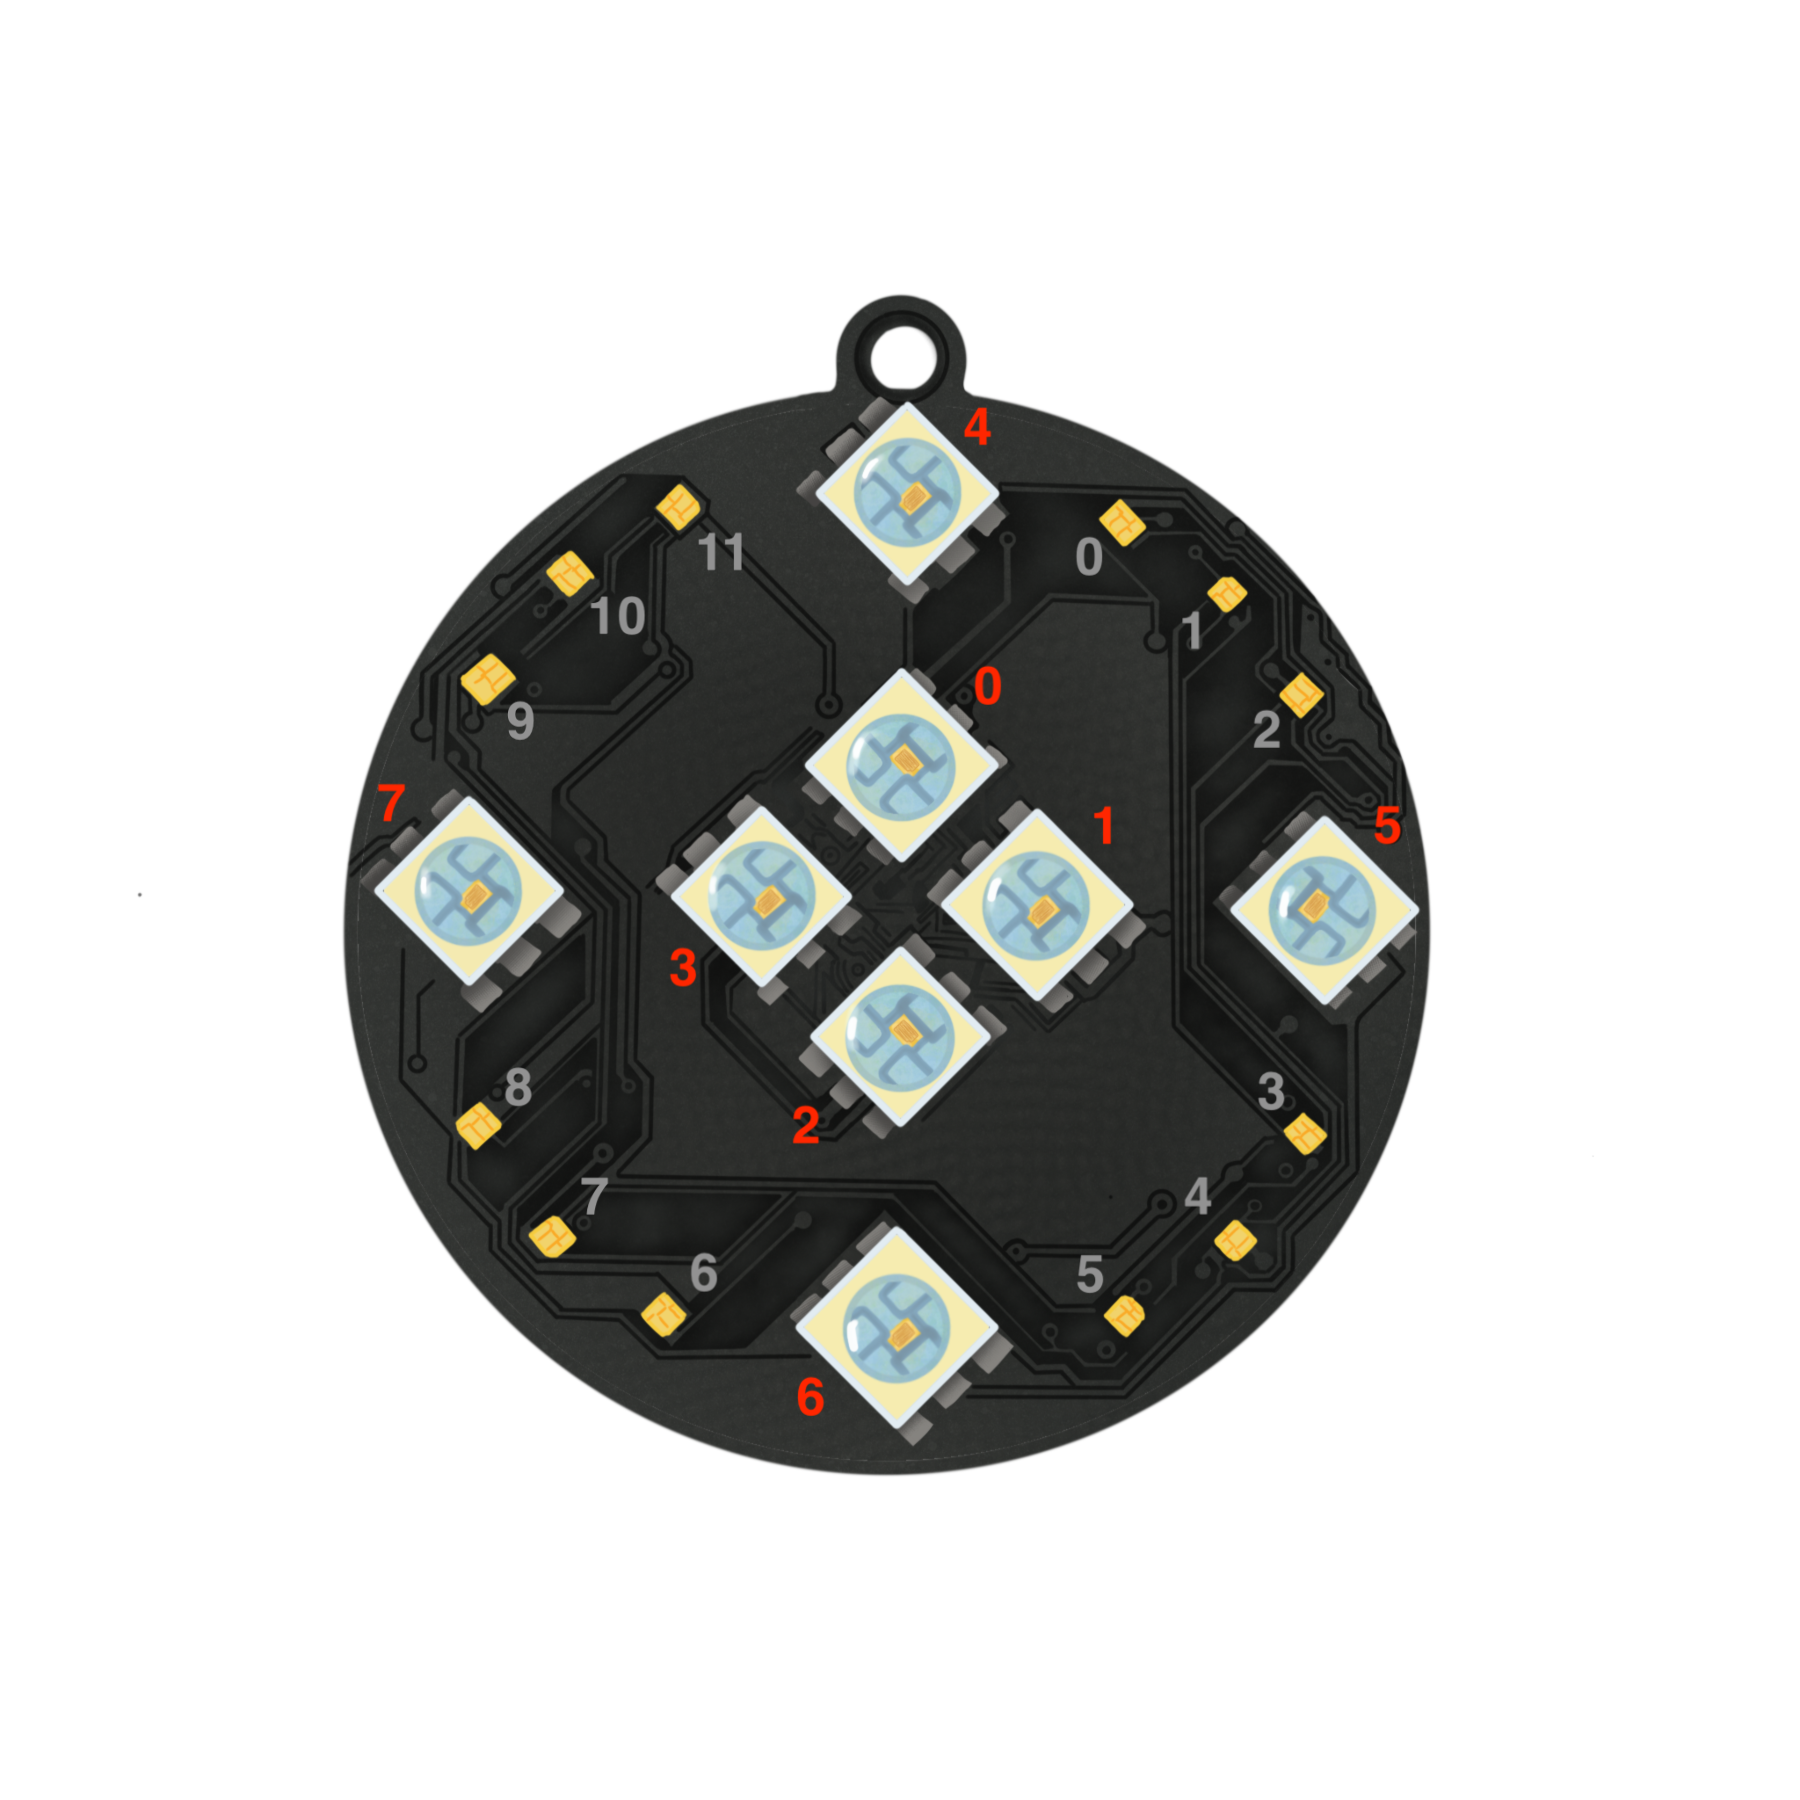
Turning on the Small LEDs
You can also turn on all of the small LEDs. To do this, instead of using SpinWheel.setLargeLEDsUniform, you can use the line
SpinWheel.setSmallLEDsUniform. Like above, the three numbers represent the red, green, and blue components of the color you want to make.
SpinWheel.setSmallLEDsUniform(0, 200, 255);
void loop() {
  SpinWheel.clearAllLEDs();
  SpinWheel.drawFrame();
}
SpinWheel.setSmallLED(2, 0, 255, 0);
void loop() {
  SpinWheel.clearAllLEDs();
  SpinWheel.drawFrame();
}
At this point, you can modify the code above to create your own pattern that uses all of the LEDs.
We encourage you to take some time to experiment with this to create your own designs.
Consider checking out: